Tuesday, February 18, 2020


The Sewing Matters neighborhood group of the Roanoke chapter of the ASG is making a shirt.  I am leading this group and have added a page showing the steps as I made my own shirt using the same pattern.  We will be making the short sleeve version. Link to Project Page
We'll be making a sort sleeve shirt, choice of flat (View B) or shirttail (view D) bottom.

Saturday, January 3, 2015

Last Sewing Project for 2014

Last project for 2014 - a lightweight fleece jacket with zip pockets. 

I walk my dogs whenever the weather is accommodating and find that zippered pockets work best for my phone, keys, and dog treats.  Other than having to make a run to the fabric shop for zippers, everything else for this project came from my stash including the pattern and fabric.
 
The pattern is Simplicity #2480, long out of print, but with the basic shape I was looking for. 
I kept it simple with one modification - I put two zippered breast pockets (modification not included in instructions, the picture on the right is altered to see how the profile changed)
 
The pattern called for twill tape to cover the seam attaching the collar.  I used a strip of white interlock knit cut on the length-wise grainline.  It looks nice and it is very soft.

I have a lot of plastic hardware for outdoor clothing in my workshop.  Using a fold-over zipper pull with ponytail elastic makes for a simple, effective pull, easy to grasp with gloves.

Saturday, May 10, 2014

Sewing Machines

The knit tops on the pages in this blog were sewn with the three machines below.

My workhorse machine is a Bernina 440QE.  (I have a Pfaff Creative 2170 as a backup; however, we have never really bonded.  If you happen to be looking for a gently used Pfaff, please contact me.)


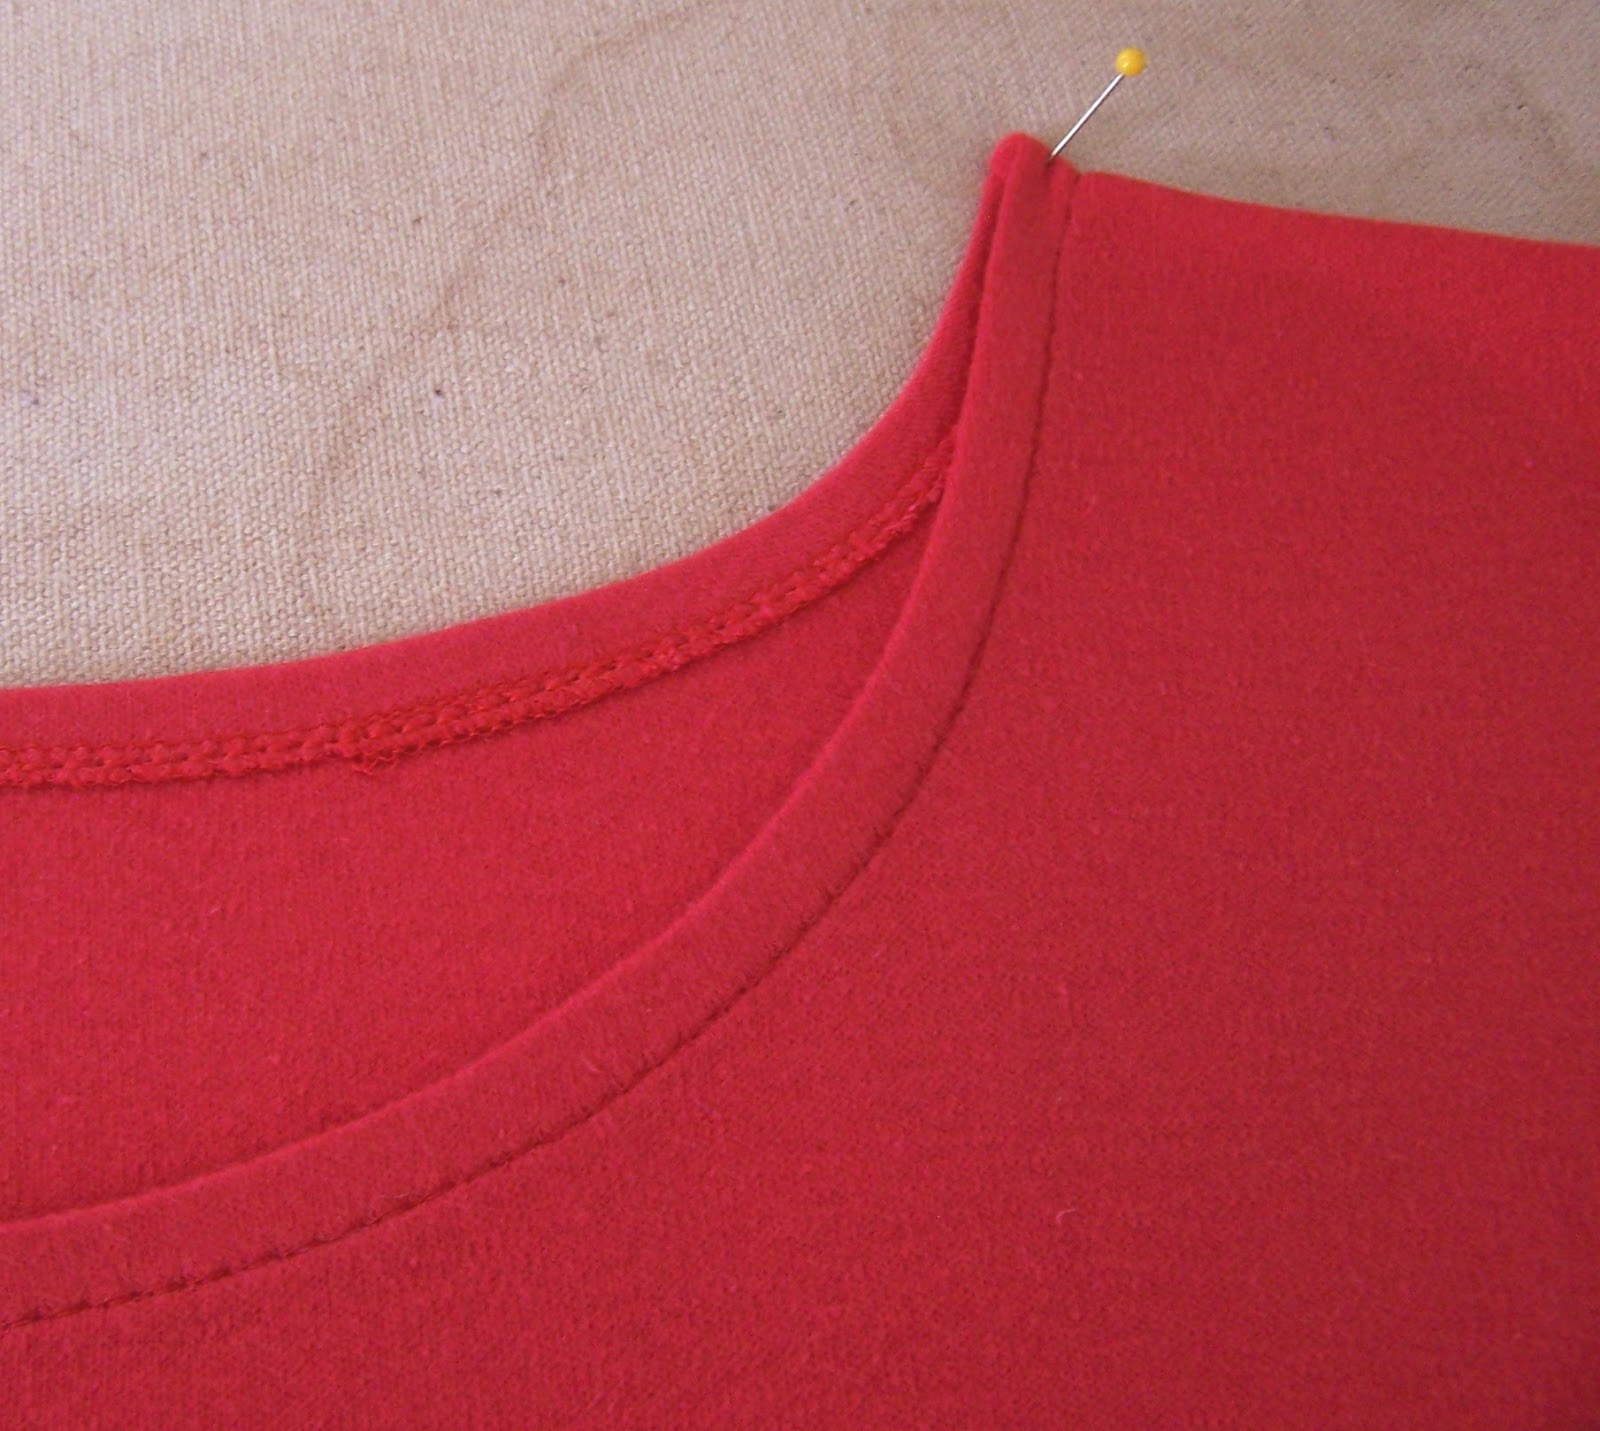
Knits wouldn't be near as much fun without a serger. It's definitely not a requirement but it makes knit garment construction go a lot faster.

My Elna 945 has a variety of stitch patterns including a cover hem that I don't use.  The time it takes to change it over is a disincentive and you can achieve almost the same result by serging the edge and hemming with a wide twin needle or with two rows with a single needle using the stretch straight stitch on a conventional machine.


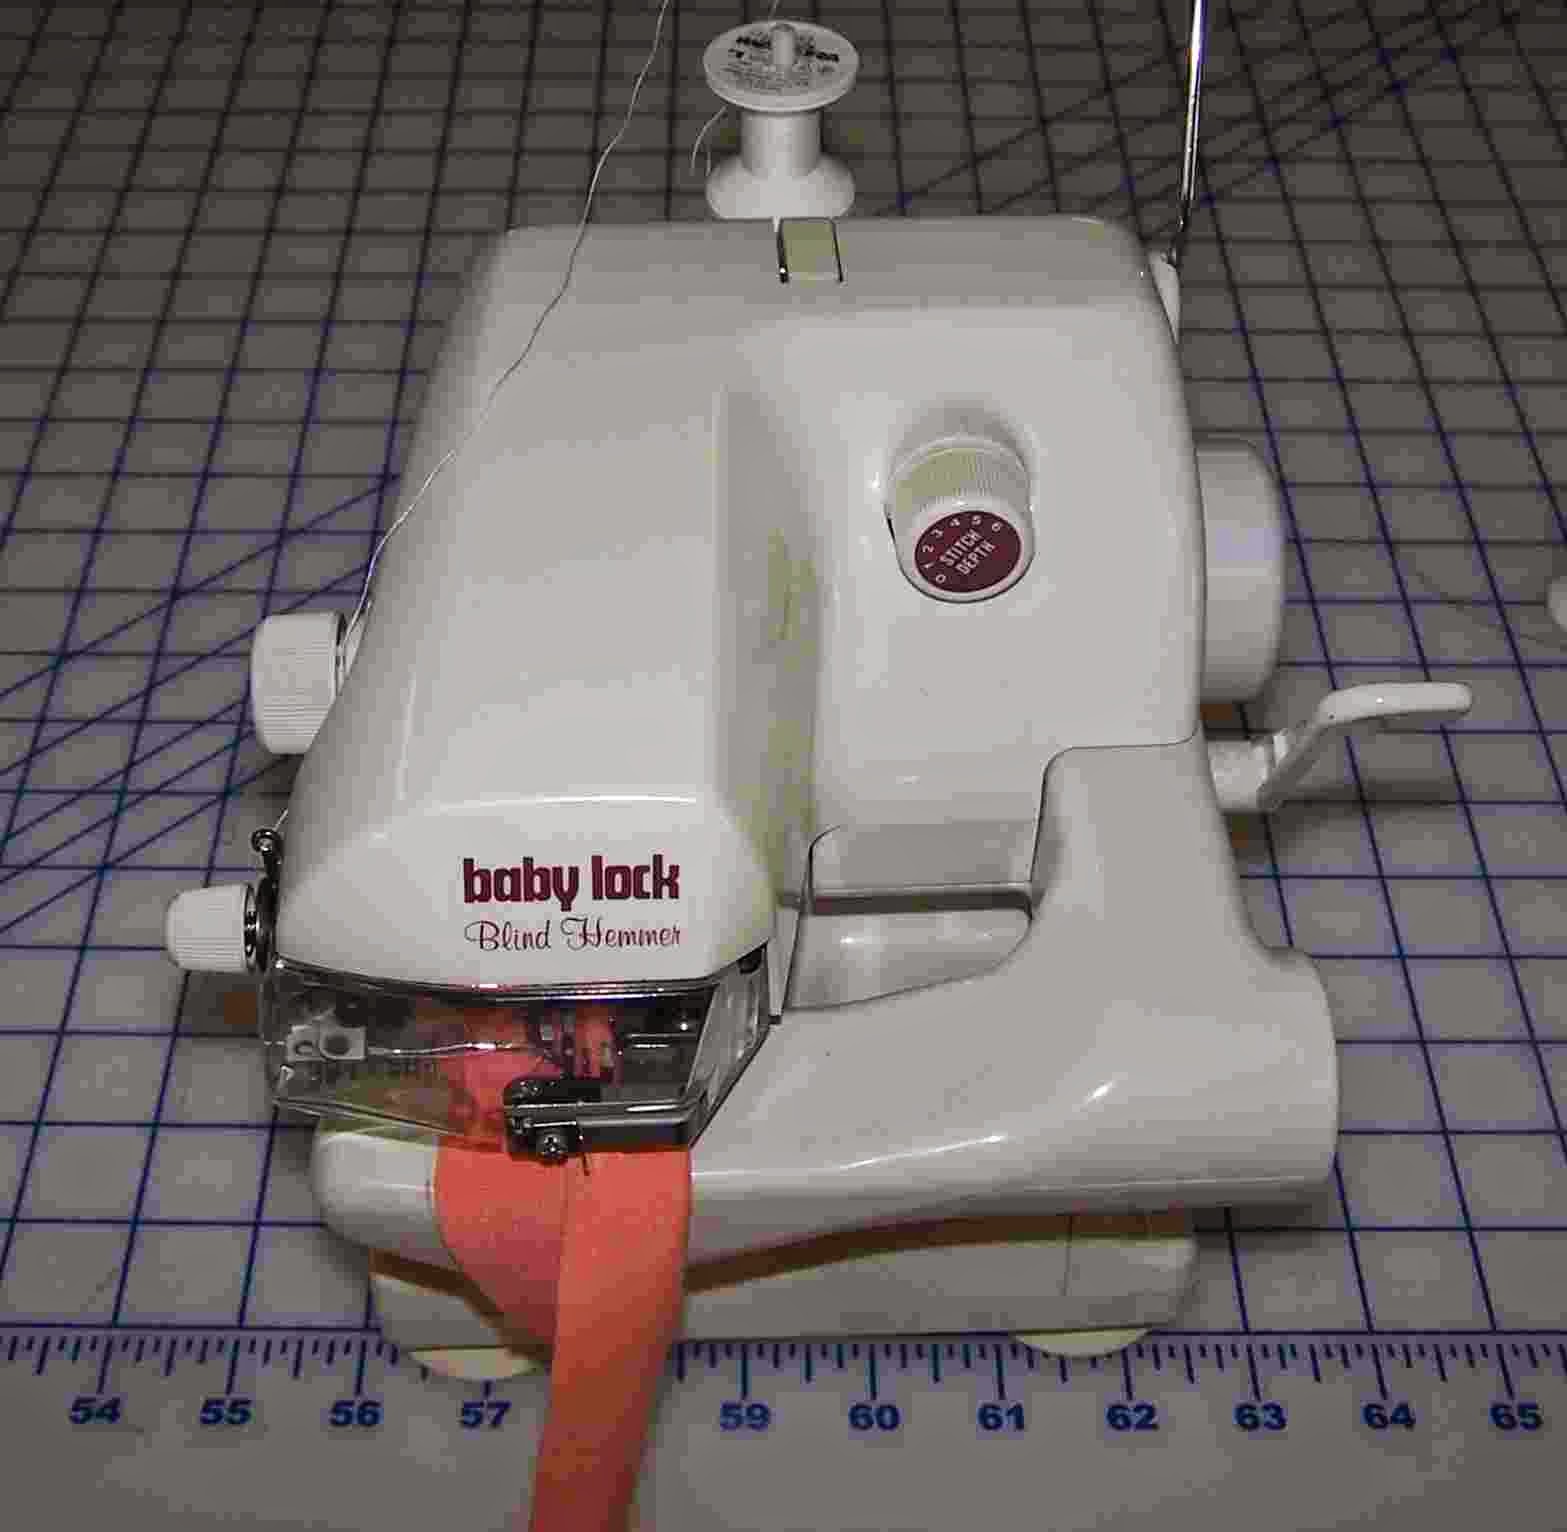
My Babylock Blind Hemmer comes out for bottom straight hems ... for those times when I don't want a topstitched hem.. It does a professional job and although the stitches are not totally invisible, they are less noticeable than what I get when using the blind hem stitch on a conventional machine. 

Friday, January 11, 2013

Making Simplicity 7182

Simple Top Using Simplicity Pattern #7182
There are only two patterns pieces. There are no bindings or facings. The neckline, armholes, and hem are all turned up and hemmed.  I used my serger to finish the rough edges before hemming.
 The front and back are both cut on the fold.  The knit I am using is 60" wide so I refolded it with the selvage in the center leaving two folded edges for each pattern piece

This design has very wide shoulder seams. To keep it from stretching later and breaking the stitches I used narrow strips of the knit cut on the lengthwise grain (least stretchy) in place of stay tape.


Before making the first stitch on the garment, I stitched a test piece to check the stitches to be sure they would not pop when stretched and that there are no needle cuts.


If you pull the seam open and see tiny cuts in the fabric you need to change your needle.  Use a needle designed for knits in a size appropriate for your project.


OK - it's all sewn together - two side seams, two shoulder seams (with stay strips), and serged around the edges that will be hemmed. The neckline and armnole edges were turned under 1/2" and stitched down using a long stretch stitch, the bottom was turned up a little more to make a wider hem. If you haven't worked with knits much you might be tempted to throw in the towel at this point because it's likely the neckline will not look nice at all. Don't worry about the appearance at this point - a little steam and pressure will work magic.
I like using a medium length stretch stitch to hem knits when the stitching will be visible. Sometimes I will widen the stitch width to just barely enough to be noticeable to provide an extra measure of protection against popped stitches - you never know when a child will tug on your shirttail...

Cap sleeve edge was turned up to form a half inch hem
Press the hems.
Use the curves and surfaces of an ironing board for what they were designed for - pin block to the ironing board.  Use a pressing cloth and a lot of steam, applying downward pressure, press the hems.
The finished neckline, after pressing is smooth and flat. I pinned it to the ironing board cover as I pressed it and allowed it to cool.  Kind of like blocking a knit project.
Bottom hem is smooth and flat.
Finish up by pressing the side seams and shoulder seams
I probably should have stopped after pressing the side and shoulder seams but decided to go back and add a second row of topstitching to the hemmed edges
Finished bottom hem.  This is when I discovered that my top and bottom thread on my  sewing machine were different shades of red.  The first row of topstitching was done from the wrong side, and the top row from the right side.